Showing posts with label ideas. Show all posts

Tuesday, June 3, 2014

Dragon Con 2014: An Updated List Of Projects

As I had mentioned way back here, there were many costuming and cosplay ideas floating around in my brain. Some made it onto the list, and over the last few months I've needed to trim it drastically.
One reason for this trim is not only due to time and other events creeping in on my schedule, but one project in particular that I really want to tackle.

Lagertha, from the Vikings TV series.

Her leather under dress looks greenish in this image, but it's actually a deep denim blue.

The hardest part will be piecing the tooled leather insets into the chainmaille tunic, but I'll have help and guidance from awesome friends who work with this kind of stuff.
I don't plan on building the maille tunic ring by ring, though I considered it an option earlier.
Nope, I just need to buy a ready made panel of 16 gauge nickel steel similar to this one, shape it and piece it out for the front, back and shoulder sleeves. I may need to email them to make sure of the link pattern and to be sure I'm not going to get something too shiny, since theirs is zinc plated.
The blue skirt she has is actually a sleeveless leather dress in a weathered blue color. I'll post detail shots later, but it's absolutely gorgeous. Under that is a long sleeved grey linen shift, in addition to the leather and metal armored wrist braces.
So yeah, I had to do some trimming to the list, and its current form includes the following:

~ Elsa's snow queen gown (Frozen)
~ Elsa's coronation gown/cape
~ Lagertha's battle dress (Vikings)
~ Caprica Six, which I already have done (Battlestar Galactica)

I figure I'm going to get almost 1 month of time per outfit for construction and 'finishing touches' (translate finishing touches as pulling out hair, crying, sewing all the last annoying bits at the last minute).
If time allows, I want to at least make a replica of her goat hide covered scabbard with a (fake wooden) sword, and maybe her shield (making it collapsible tor travel).

Speaking of having awesome friends who can help me with the leather work on the Lagertha project; here are a few pictures of me wearing my spiffy new leather shoulder armor made by my talented friend, Greg Ruddy:


Since the raven seems to be a recurrent theme in my life and my general aesthetic, he applied an old Viking style raven motif to both shoulders. The deep purple leather wrist braces he made me last year, also have a similar design. If anyone is interested in possibly commissioning something similar, I can put you in contact with him. You can also find him via Facebook:
https://www.facebook.com/greg.ruddy.1



Tuesday, May 20, 2014

A Fabulous Antique Clothing Reference

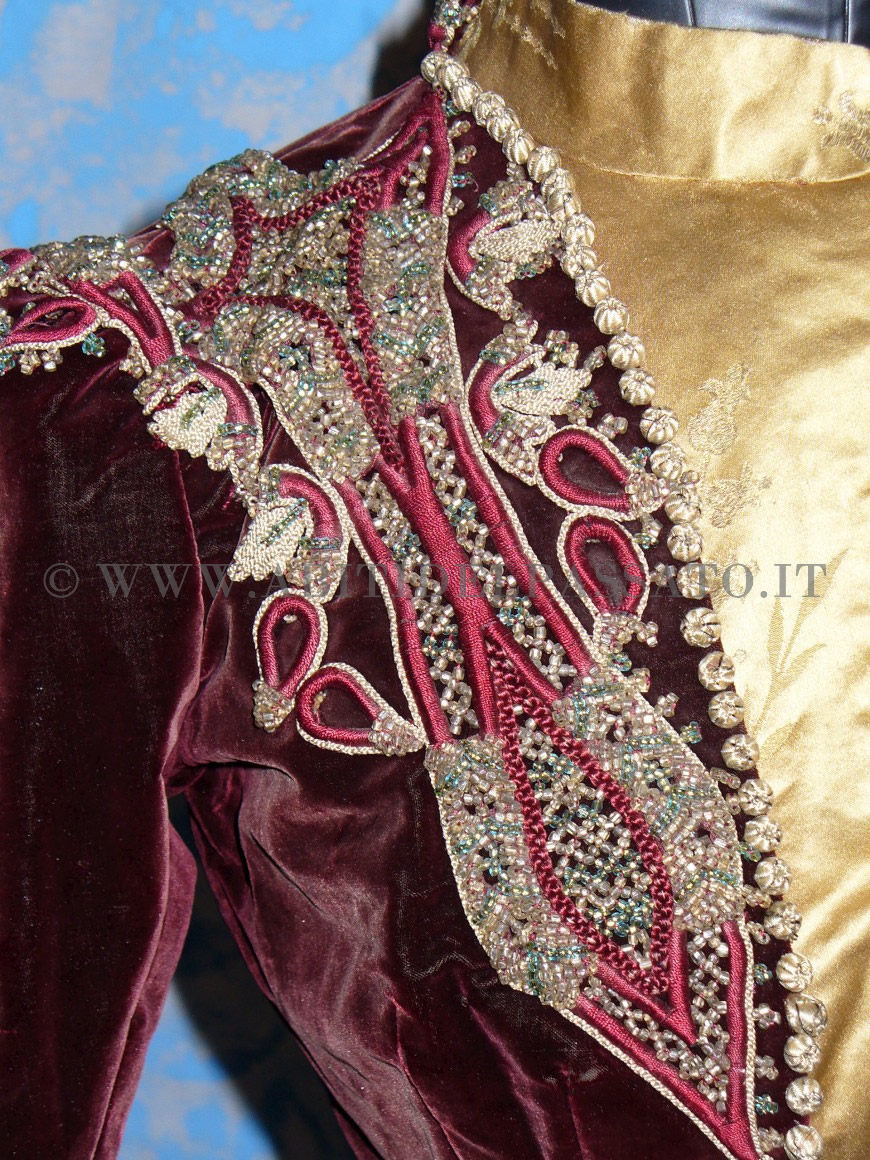
Scrolling through Pinterest during lunch today, I stumbled across a great website chronicling a vast collection of historical clothing between the 18th to 20th centuries. Some of you may have already known about this little corner of the web, but it's new to me.
It's all in Italian but navigation is pretty straightforward, especially after you learn a few of the words via Google Translate ;-)
The photos are not the greatest quality and some of the dates on a few items seem off a bit, but it's still a great resource for ideas and inspiration.

Abiti del Passato:  http://www.abitidelpassato.it/contents.aspx

One of the beauties found on the site:


Saturday, September 28, 2013

Dicken's Fair; Narrowing It Down

Already, I've been making moves toward my new ensemble(s) for this year's Dicken's Fair.
I decided to have a proper hoop made for me, as this will save me a good chunk of time, and it's already on it's way.
Many thanks to my friend Cait who suggested Originals By Kay.

I will still need to make a fully flounced petticoat to go over it, and (cue dramatic music) a new corset.
It will be very basic, plain cotton, but I'm still not sure I will have the time to make that as well. Especially if I want it to be totally comfortable for all-day wear.
There may just be another trip to Dark Garden in my near future.

I also plan on finishing the Velvet Hussar/Sisi project that was started last year.

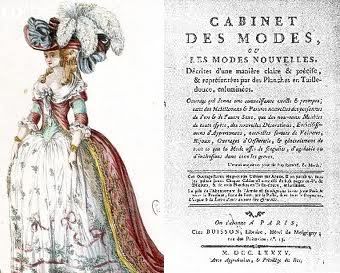
Below are just a couple of fashion plates I have for inspiration. I adore the dress on the left in this one, but I'm thinking of rich blue hues. Perhaps with a contrasting pale pink or burgundy silk bonnet.


I also want a mantel or some kind of decent outerwear this year too. I became really tired of messing with a shawl, and want to keep my hands more free. Either one of these would be wonderful. I'm really drawn to the one on the right with the lace:


Wednesday, January 2, 2013

At The Starting Gate: 2013 Project Possibilities

There are sketchbooks loaded with ideas from over the years taking up a good chunk of space on my bookshelf. They are filled with scribbled down dreams and the shadows of erased pencil strokes beneath a final drawing. Pages and pages of projects involving the creation of garments and other items and props for the burlesque stage. It's like the old saying goes; so much (fill in the blank), so little time.

Well, if I'm going to make any New Years resolutions, here is a list for the sewing half of things.
I was inspired by my friend Cait of Curse Words And Crinolines and her latest post on sewing plans for the new year.
Keep in mind these are *new* projects, not ones I'm currently working on. Some will be out of the pages of those sketchbooks.
Perhaps I will get all or just a choice few completed by the end of 2013, let alone started, so here goes:

A pair of 18th century stays, perhaps two; middle and late century:


A couple of 18th century gowns. A saque, a robe a l'anglaise, and hopefully my 'historically accurate' version of the "It's Turkish!" dress from the film Amadeus:


I have never been a big fan of the early bustle silhouette, but some recent stunning creations by a few colleagues have inspired me to look again at the years between 1873-75 with fresh eyes. It can be done elegantly and you don't need to look like a walking, overly decorated, wedding cake :-)

 The lavender gown on the right is an original at the V&A;
"Day dress, 1873-75. Museum no. T.112 to B-1938. Given by Miss M. Eyre-Poppleton".

A new hoop, and the Laughing Moon Lobster Tail bustle I've been curious about for years. I'll need it for the early bustle gowns pictured above:


A hoop era ballgown, 1850s or 1860s:
And for Dickens this year, the ensemble to the right in the same photo.

A natural form gown of some kind:


An 1830s gown (Cait and I have plans. Fluffy cupcake-like plans, muwaahaha):


Again for Dickens; a mid Victorian military-inspired  ensemble...or two. One has been on the back burner for a while:


A 1930s evening gown design I found ages ago that I've been yearning to recreate, perhaps in time for the Max Raabe show in April.
I'll leave that one a secret for the time being...

Last but not least; a new Victorian corset:


Something basic and sturdily made, yet not bulky, of  plain cotton designed for longer periods of wear (*cough*Dickens Fair*cough*). I'm even considering having this one made for me instead of making it up myself. An investment I shall make sooner rather than later, given the projects I wish to complete.

Stay tuned XOXO!


Friday, August 26, 2011

Future dress project that I MUST DO...

Ok, something just occurred to me.
Week before last, I had the pleasure of finally seeing my favorite film, Amadeus on the big screen.
I was too much of a wee thing to have seen it, or even remember it, in theaters when it came out.
ANYway, I digress;


"It's Turkish. My hairdresser says that everything this year is going to be Turkish".

;-)

Yes indeed, I want to make this dress and hat......or at least my version of it.
Admittedly while the costumes in Amadeus are great but highly questionable in historical accuracy (the women's in particular, there are zippers up the backs of the dresses for crying out loud!), this one isn't so bad.
BUT, there are issues with it. I can see her panniers poking through, the bodice is cut wrong, are there stays under there?
And if she were that fashion and trend conscious she wouldn't be wearing the old style panniers with it, she'd likely have a bum roll and the skirts might even be hitched up into a "Polonaise" if she were in the city.
I could go on and on, but it's a really fun costume and that is what carries though in the scene. The dress *is* Katerina.
One thing I do love, is that they used the Robe a la Turk concept for the dress. Note the little cap sleeves over long fitted sleeves.

So what would I do with my version?
I would keep the Robe a la Turk concept, but make it more accurate.
The front would be a zone front, as most original engravings and illustrations of this style suggest. The film version has a faux "V" front and I really don't like the way it's done. It looks like part of a high school play stage costume. As though it's just pulled tight around her torso and has built in boning rather than a separate pair of stays. Considering the rest of the costumes in the film with zippers, that is likely the case.


I do love the striped fabrics used, and the way they use them here is pretty spot on. During the late 1770s and early 80s, the more you could pile on your dress and head, the better. I've seen original fashion illustrations that support the same use of drapes and sashes on her skirt. As well, the gold bullion tassels and fringe.
And I really want a walking staff. Perhaps an easy project after a trip to Home Depot?
Hers is a little short, but perhaps that was personal preferance back then?


As for her hat and her hair style; pretty darn near perfect.
I may do a slightly different style in both hat and hair to suit my own tastes, but I'll keep the general concept and materials.

While I must be realistic, this likely won't come to fruition anytime soon. I have my gent's wardrobe to sew first, then mine, then the fun crazy stuff such as the above project.
...meanwhile I'll be hunting for the perfect wide red and white stripe silk.
If that ends up a bust, I could just buy some light ivory silk duchess satin, dye some of it red, and sew strips of each color together, making my own striped fabric. This is doable, since it's trimming and not a whole dress that needs to be striped.

Images care of Costume Dramas Obsession.

Tuesday, August 23, 2011

More on the "Inspiration Board"...

To elaborate on the earlier post;
What was just a frame I'd taken a fancy to at Ikea, that ended up sitting in a corner between moves, turned into a fun project.

Virtually any fancy frame can be turned into a great collage/idea board for a craft or sewing area. It also ends up being functional wall art.

Thrift stores, garage sales, flea markets and antique shops can yield a bounty of gorgeous art and picture frames, often at a low price.

Mine came with glass when I bought it new. I didn't have a use for it, so I gave it to a friend that needed an oval cut of glass.
I considered using cork sheeting for the center, against the heavy cardboard it came with. I discovered cork is pricey, and either came in sheets to small, or way more than I needed.
Instead, I opted for poster board, the kind with the foam core, just over 1/8 of an inch thick.
This is a great option, because not only is it much more affordable, it comes in colors! I opted for a slate grey print that almost resembles granite, but I was tempted to buy some in pink, or Tiffany blue...and I may at a later date ;-)
I also found some old fashioned map tacs to use to pin my ideas to said board.


Using the cardboard back that came with the frame, I traced out the shape on my poster board with a pencil, then carefully cut it out (on a cutting mat!) with an exacto knife.
If your frame has no backing board, or nesting groove (where the art and/or glass sits) you can trace, measure the inside size of the frame, and add about 1/2 inch to all sides.
You'll also want to cut a piece of heavy duty cardboard for a backing to the exterior surface you'll be tacking things to.

My frame has little metal tabs that can be bent up and down to hold these in place.
If your frame doesn't have these, they can be purchased at a frame shop or art supply store. They are usually nailed in with a few taps from a hammer.
If your frame isn't wood, and has no options for these tabs, duct tape is your friend ;-)
Same goes for hanging your frame on the wall; most frames have a little spot or a metal hook so it can hang from a nail in the wall, but if not, you can also buy this hardware at the above mentioned sources.

All in all, it's pretty easy.
If you live in an older house with plaster walls, the lighter the frame the better. Or, invest in a stud finder so you can anchor a nail into your wall securely.
The last thing you want is to have your pretty frame, with the lovely collage you worked so diligently on come crashing down, leaving a gaping hole in the wall.

Another option besides using tacks; Ribbons.
You can take narrow ribbon, up to 1/4 inch wide, and run them across the board surface, tacking them with tape in back, to make a diamond pattern.
This way, you can tuck your found images and fabric swatches between the ribbon and board, for a pretty effect.
This is a great tutorial over at 7 Layer Studio, with photos (!), that I sadly do not have of my own board's progress.
Enjoy ;-)
xoxo

Friday, August 19, 2011

My inspiration board

I just put this up today. The frame came from ikea ages ago, but I finally got around to putting the foam-core in it, to tack things to. Pictures, lists, material swatches, the possibilities are endless ;-)