Showing posts with label details. Show all posts

Thursday, May 22, 2014

Elsa's Snow Queen Costume: Details, Details...

During my lunch breaks over the last two days, and well into the witching hour last night, I drew up the design details and applied all the crystal to the neckline and sleeves of the Elsa shirt (worn under the bodice).

 The shirt laid over the template and wax paper between the shirt fabric.

This is what I like about working with sheers when having to do applique or surface design;
you can see through it. I know the neckline here looks small compared to Elsa's almost/off-the-shoulder style, ut this is just what mine looks like when it's not on. The edge actually stretches open more and sits nicely on the outer curve of my shoulders. After a few wearings, once the rhinestone glue along the neckline expands a bit, it will fall a little lower on the shoulders like hers.


This picture is not such a good example, and not what I used to get the complete design, but it helped.

After finding a clear enough image of Elsa's arms and sleeve design, I was able to freehand sketch a template on paper to use as a guide. I rolled the final draft of that up with a top layer of wax paper into a tube, shoved it up each sleeve, pinned it in place and began applying the remainder of my crystals. Nearly 900+ Swarovski crystal flatbacks in various sizes have gone into this shirt.

 Early stages of the design.

First sleeve prepped and ready for the sparkle to begin.
This was taken before finishing the sleeves into points at the wrists. I also added clear elastic finger loops so they stay pointed and don't flip back over my hands.

I actually used two different colors of crystal; one was the regular clear crystal with the foil backing, the other was a color called 'crystal shade' and it has a very subtle silver coating on the face of the stone. They are extra sparkly and have a slightly different hue.

I have photos of a finished sleeve, but it's on my camera at home. I'll be posting photos of me wearing the whole thing soon enough, so stay tuned! I might also keep this as the shirt I use for the DragonCon version of this costume, but this is a first draft of sorts. There are a few design details I'd do differently, but if I end up not getting to it by the end of August, I'll at least have this one ready to use.

Now, off to Disneyland!

xoxox

Tuesday, May 20, 2014

A Fabulous Antique Clothing Reference

Scrolling through Pinterest during lunch today, I stumbled across a great website chronicling a vast collection of historical clothing between the 18th to 20th centuries. Some of you may have already known about this little corner of the web, but it's new to me.
It's all in Italian but navigation is pretty straightforward, especially after you learn a few of the words via Google Translate ;-)
The photos are not the greatest quality and some of the dates on a few items seem off a bit, but it's still a great resource for ideas and inspiration.

Abiti del Passato:  http://www.abitidelpassato.it/contents.aspx

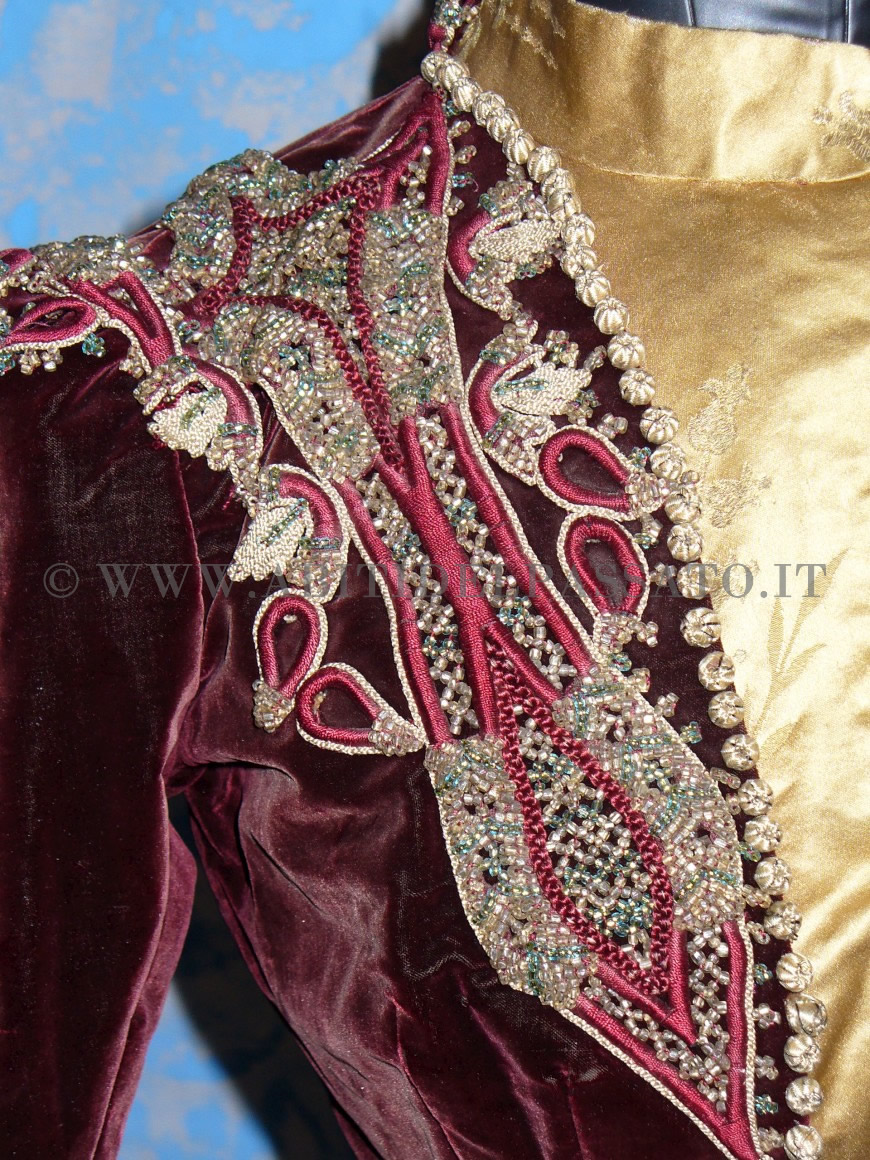
One of the beauties found on the site:


Friday, January 3, 2014

Those Wonderful Things...

Things of beauty that make your breath catch in your throat for a second or two.

1890's Blue Velvet and Gold Embroidered Shoes and matching tights


Detail: Mantua, Stomacher and petticoat, Italy, 1700. LACMA Collections Online

Monday, December 30, 2013

Rococo Reading: A New 18th Century Hair Manual


During time off for the holidays (and recovery from the flu) I stumbled upon what could be a very useful find during my online wandering.
Hairstyles are one of the more difficult aspects of 18th century costuming, and getting your look perfected can often seem more stressful than sewing the actual wardrobe.
Kendra Van Cleave of Demodecouture.com, comes to our rescue.
She has created a book detailing 18th century hairstyles and techniques, and is slated to be released this spring. Price; $45 ($5 discount if you pre-order the book) according to the Facebook page.
Pre-orders begin Jan 1st, 2014!

http://18thcenturyhair.com/

Overall, this looks like something I will most definitely be purchasing as soon as pre-orders start. While I've had some experience with wigs and creating historic hairstyles with my own hair, the 18th century is something I have rarely delved into, and really wouldn't mind having a go-to guide for. I've done the more simple mid-1700s look; the chignon with a pinner cap or a well-propped-up plume. But I yearn for the somewhat taller and fuller styles between the 1770s and 1780s.

Be sure to visit and 'like' the Facebook page for updates and more info:
https://www.facebook.com/18thCenturyHairstyling

Here is a small sampling from the table of contents (draft), and some techniques that will be covered;

"...Working with human hair: 
  • Curling
  • Straightening
Working with synthetic hair & wigs:
  • Purchasing
  • Different kinds of wigs & hairpieces
  • Making hairpieces (ponytails, ringlets, buns, braids, etc.)
Wigs: 
  • Adding extra hair
  • Changing the hairline
  • Enlarging a wig
  • How to make it all look smooth
  • Masking an obvious wig line
  • Wig care, storage, & travel
Powdering
Section 3:  Finished Styles
  • Women:  22 styles spanning 1700-1799
  • Men:  3 styles spanning 1740-1799
Both with step by step instructions illustrated with color photos, and lots of ideas for variations."

Monday, November 25, 2013

Just a little update,,,

I'm chugging along on the 1850s bodice for Dickens.
The fabric I'm using is an ivory silk taffeta, and is a dream to work with. I've missed using this fabric, it's been a while!
Before you get worried about ivory silk at Dickens fair; not to worry. I'm careful, and I have a shawl.  I can also drape it across me in a bohemian manner while at tea, if I need to ;-)

I'm using the Simplicity mid 1850s pattern #9761 as a guide, but will be doing something else for the sleeves and front.
I may even round out the points of the peplum in front and in back.
As far as commercial patterns go, this one is going together fairly easily, I just wish I'd taken some photos yesterday. I'll post some here when I'm further along on it.

I'm having the hardest time deciding on what sleeve style to do, as there were so many lovely options during the 1850s. I'd love to get away from the typical pagoda style I see everywhere, but still need something that isn't too time consuming.
The bodice front will have faux revers, and little covered buttons all down the front. I'm hoping to use some of the burgundy stripe in the fabric I'll use for the skirt to cover the buttons with. That way I'll have a nice pop of color on top, and it won't look too bridal.
I have some beautiful net lace trim on the way, too, for both the bodice and somewhere on/in the sleeves.

But yes, sleeves.
What style?! The good part is that the sleeves that come with the pattern can easily be tweaked to create any of the following, so at least I have a template that fits the bodice armscye already. The less futzing, the better!
Here are a few concepts rattling around my head as options:

 The tiered sleeves on the gal in blue.

And this plate again, either one of these would be great; puffed or with multiple little cap sleeves.

 And this green dress is just 'effing amazing. Again; puffed sleeves seem to be all the rage, and visually make the waist smaller by contrast.

With the puffed sleeve option, it all depends on how it will look on my frame, so I'll definitely do a quick mock-up first. With the large skirt it could either look fine and balance out, or make me look like a Stay-Puft marshmallow girl.
XOXO


Tuesday, June 25, 2013

Example Of My Current Project: A Hopeful Outcome

This is what I'm attempting for my Robe a l'Anglaise, for both the gown and stomacher style. I'm either going for a Super late 1770s or early 1780s, such as these examples show.


And I love this gown in the below portrait. Again with the similar front but with the pinked & scalloped collar.
I have two colors of silk taffeta in my stash that may be going into something similar to this.
One is a sea-foam color, the other a rich gold.

Louise Élisabeth Vigée Le Brun??

Sunday, December 9, 2012

More Insanity By Choice


This is only my 2nd or 3rd time doing cartridge pleats for a skirt, and this is probably the most fabric I've ever had to pleat to a waistband; 8+ yards of black cotton.
At least I found, in my wondrous stash, a heavy grosgrain and silk satin covered fabric belt. It's perfect for this heavy velvet skirt that needs a heavier foundation to hang from. While only the lower half of the skirt is made of the velvet (it would be much too thick to pleat and fit the bulk into the waistband), it already weighs a good amount. I am seriously considering putting a waistband on my hoop petticoat. The drawstring seems like it would be much too weak to hold the weight of the skirt, and coat skirts of velvet and fur, for any extended amount of time


I also took a break from this and made a fitted blouse today from a lightweight cotton sateen. This is not only something to wear under the Sisi velvet ensemble, but as part of an alternative outfit to wear this year at Dickens Fair. 


More photos of this soon. The dress form in the photo is actually about a size or two bigger than I am, but I just needed one that wasn't broken (like the one I was using that *is my size) to take photos on.
I used the Truly Victorian 1860s Darted Bodice - TV446, and extended the length from the waistline. I literally just added extra at will, which is why the hem is all crazy in back. I will even this out, but the little tail that happened in back is actually kind of cute
There are a few details I want to add during the week; a vintage lace collar and perhaps pleated or ruffled cuffs of the same fabric.
I'm also hoping that I can get a separate overskirt and swiss waist made by next weekend to wear with the above skirt and blouse at Dickens next weekend. Cross your fingers folks.
The Sisi ensemble is nearly done, but the finishing details on the coat are killing me.

Friday, December 7, 2012

The Velvet Hussar - Details

The fur hem is nearly complete.
I swear, when this part alone is done I'm going to dance around the house in victory!

In order to stitch the top edge of the fur to the coat, and get a nice roll-under of the pelt edge, I needed to machine some black bias tape to it. After folding it over, I had not only a nice clean edge to work with, but something much easier for thread and needle to sew securely to.


I am definitely taking the lint brush to the entire thing when all is done. So much fuzz...


Monday, September 12, 2011

Front placket

On the front of the dirndl dress skirt. Not on a seam. This is one of those tricky sewing things that is akin to explaining, without pictures, how to tie shoelaces. I'd like to do a tutorial on just this in the future.

Friday, August 12, 2011

Sources, Tips and Tricks?

I've decided to try my hand at metallic bullion decoration for my gent's burgundy velvet frock coat. Also known as Goldwork.
I'm not intent on anything too involved (like the bodice in my header image), but I'd like to do some designs on the self fabric-covered buttons, both on the frock coat and waistcoat.
I figure buttons are a good place to start for a beginner; less surface area.
Something along these lines:
http://goldnstitches.typepad.com/gold-n-stitches/2010/01/goldwork-buttons.html

I have a pretty good idea of how it's done, but I was wondering if anyone knows of some good online tutorials on the subject.

xoxo

Tuesday, August 24, 2010

Spangles, where art thou?


I'm on the hunt for those tiny flat sequin-like embellishments, traditionally called "Spangles" or "Paillettes".
There are modern versions in plastic, but I would like to hopefully find the real metal ones, as seen on this waistcoat by Bjarne Drews.
They have proved a bit difficult to find in a color other than gold, but I may have found a few good sources. Two being hedgehoghandworks.com, and The Lacemaker.
If I decide I ever need to cheat and go with some made of more modern materials, Cartwright's Sequins might be a good bet as well.

Thursday, August 19, 2010

The (almost) Lost Art Of Fly Fringe

Thanks to this little tutorial, those of us willing and patient enough can learn to recreate fly fringe, also known as fly braid. There are varying degrees of complexity, ranging from seemingly simple, to layered multitudes of color and texture.


This was a popular form of trim found on many gowns during the 18th c., and in some cases, even found on ensembles from the 19th century.

Follow this link and learn to get "knotty", the 18th century way (Ha! yeah, I know that was bad).
http://www.quaintrellelife.com/fly_fringe.html