Monday, July 28, 2014

Elsa Update: Part II

The Elsa cape arrived!
When I found the package sitting on my front porch after work today, I steeled myself for disappointment. I'd heard mixed reviews about the seller I'd ordered it from, and after getting burned in the past, I had some apprehension.


I opened up the package only to have my nose greeted by a strong plastic chemical smell.
Then the color got my attention; It's blue. Very blue.
Deeper than expected, but still very pretty...but will it work with my costume?


I want to scatter rhinestones on the top portion in the silver areas...

The cape was made by Angels Secret on Etsy, a cosplay costume company.

Then, after I unfurled it from yet another plastic baggy, I noticed all the tiny blue sequins scattered between the snowflake design printed in silver glitter. The epic shimmer it gave off distracted me from the deeper blue color of it next to my own gown. In the following images, it may appear more aqua, but let me assure you that it's closer to a basic blue. The slightly turquoise side, but more cool blue.
It's a super sheer woven net with a slight pattern that reminds me of vintage hat veiling, and the more I unfolded and looked at it, the more I liked it....except for the Velcro they added at the top edge. That's going away as soon as I find my seam ripper.
Overall, it's actually quite stunning and photographs well.

It's SUPER long. Excuse the sewing room mess, and I'll try to get photos of its full spread soon!

There are images and stills of Elsa's cape that appear a much deeper blue than the rest of her ensemble. Additionally, her entire outfit seems to vary in color througout the film depending on environment, lighting and her general mood. So while the quality isn't absolutely stellar, I decided that this cape will indeed work....with a little tweaking of my own.


If you remember the original shimmery aqua net fabric I had purchased for the cape I made my Disneyland version from; I found an entire bolt on sale recently and grabbed it while I could. A good decision since I've decided to layer this super sheer fabric of mine over this cape.
This not only makes it more cohesive with my gown and shirt, it adds an amazing level of icy depth to the look of the material. Even with this layer, it's so sheer that you can still get an intense sparkle from the cape underneath, and still see the shimmery snowflake design clearly.

 My shimmer net draped over the upper top of the cape I received, next to my gown on the right. it's all bundled up so you don't see the sheerness, but it's a good representation of the color effect.

With all that said, I do really like it. Before I add this top layer I'll have Anders take a few photos of me wearing it by itself, with my gown in various lighting, to see if I really need to add it.
Like Tim Gunn always says, "Make it work!"

Elsa Update And The Final Stretch


 Oh gods...four weeks left before Dragon Con...crap.

This past weekend I was able to get the base gown for my Frozen cosplay fitted, lined, hemmed and the seams boned.
The corseted undergarment ended up being a waste of precious time, since I didn't like the way it fit (squashed my boobs a little too much for my taste). I can fix it, but I decided that I just don't have the time to futz with it right now, so I put some sturdy spring steel into the dress bodice itself. This essentially made the dress its own corset, and the fit ended up remaining really smooth where I needed it.
Now I wait for the sequins to arrive from various parts of the world.
With about 4 weeks left of real work time left before Dragon Con, I still have the Lagertha project to complete, and I need to keep my nose to the grindstone with sewing, leather work and chainmaille tunic construction.
But enough with my whining. Here's some things I'm grateful for...

For the Elsa gown; I'm grateful that I already have the shirt I made for the Disneyland costumed event, though I did do some altering to the sleeve armpit areas so they aren't so loose. I also made it off-the-shoulder as it should be. The cape is on its way and should be here by mid-week, I found a fantastic wig and I have the shoes. This ensemble is 80% done.

For the Lagertha battledress; I'm grateful for already having the brown suede trousers, the
boots and nearly all the bits and pieces needed to build this thing. Anders is going to help me find a good fake Viking sword/scabbard and help me build a stage shield that breaks down for travel.

In all, I think this will work. If I can focus after work during the week, utilize my weekends to their full extent and get good chunks of things done every day, I should be golden.

Sunday, July 20, 2014

Frozen: Constructing Elsa's Gown

So I finally have the base gown put together for my "deluxe" Elsa cosplay for Dragon Con!
Copying a strapless dress pattern from the 1980s for the basic shape onto muslin, I extended the lines for length and added a flared hemline. I also added a small train that comes to a subtle point. I flat-lined each piece in a rich turquoise satin, which will also peek through at the leg slit on the front of the skirt.


The fabric I found on Etsy is absolutely perfect, but the icy linear pattern done in silver threads goes the width of the fabric, not the length. It wasn't as wide as I am long, so I had to futz with the pattern a bit, making the bust-line area out of separate pieces.


This added the length I needed and the seams won't show once all the sequins and bodice decor goes on over it.


This dress form is my Uniquely You form, and after at least 3 fittings and re-fittings/stitching/shoving/zipping; she's still a bit full in some areas (mostly the chest and hips) compared to my own size and shape. I may need to shave some of her foam down, as many others with similar issues have done to their own Uniquely You forms. I'm 5' 10" with a 36" bust, 27" waist & 38" hips. This form is at a 37-28-40, even after fitting the outer fabric shell to my own body. The base foam figure is already their size "Small", and their X-Small base form is too short in the torso for me. For now, it's something I can pin stuff to until I can make those adjustments.


Once I get all the grommets set and boning inserted in the corseted undergarment, I can do a little more adjusting to the seams to get a final fit. Then I'll finish the hem, face the top edge, add some very light boning to the bodice seams to keep things smooth, and put a light blue zipper up the back. Then I'll start applying the sequin and crystal decoration.
I wanted my dress to be a bit fuller at the hem than what is portrayed in the animated film. The richness of this fabric is amazing and I just wanted more of its gorgeous, icy, folds swishing around me as I walk, and cascading behind with the sheer glimmering cape.


Friday, July 11, 2014

The Frozen Bustier; A Possible Costume Itself?

Chugging along on the Dragon Con projects, here's a mini update from the Frozen front lines on the Elsa under-corset.
I may need to order more corset steel and some smaller lacing grommets for this portion of the project, but it's halfway done!


Sewing the interior casings for all the boning; I'm so glad that part is completed.


The creepy stare of my Elsa doll. She makes sure that I keep sewing.

It's starting to resemble a 1940s or 50s style bathing suit, right out of a Vargas Drawing. It has a very distinct 'pin-up' look to it, and I'm almost tempted to make it something that could double as another costume....hmmm...maybe a pin up style version of a classic superhero? What superheroes do I know of that had/have turquoise as a main color in their costume?
Or, I could do a superhero Elsa! Oh wait...there's that whole time thing I need to finish stuff in. So, it's a "maybe" for Dragon Con (but oh, it would be so cool. I have so many ideas!)

Saturday, July 5, 2014

Elsa's Snow Queen Gown: Building The Foundation

This weekend is finally free of obligations, so I can focus on the first stages of my Dragon Con costuming. We will be taking a break from the Lagertha battledress for the time being, dear readers, so that I can begin on building my Elsa gown.
The dress will actually be one piece instead of a separate bodice and skirt, and the bodice detail will be comprised of all the sequins, rhinestones and chunky crystals.

I'm starting with a semi-corseted foundation to keep the smooth lines of her dress and bodice, extending well past my hips; something akin to the corsets from between 1912-1916 or so.
I don't necessarily *need* this kind of thing, but I want that extra bit of smoothing power we all know and love from corsets. Plus, it will help me get into character, ensure my posture stays proper, and possibly keep my back from getting angry with me after being on my feet for hours on end.

Fitting what will become the corset foundation.

I'm utilizing 1940s & 50s couture fitting techniques out of a vintage patterning book. The little horizontal center tuck might look odd now, but it will give me a perfect fit through the bust.


And viola! I have my new customized pattern for the corset. Ignore the uneven bottom hem.
This will be figured out in the final construction when I can better determine what shape/length is best. Most likely the boning will extend from the top edge, to just above the hip joint for ease of sitting, with the garment made like a boned micro mini dress.
This will also double as the pattern for the outer layer, too. I'll simply extend and shape the lines of the above pattern pieces into a long, flared, floor-length gown

 Should I get stuck at any point during this whole Dragon Con costuming process, I have a special weapon, thanks to my friend Jenny Storm:


In an emergency, I'll crack open "Elsa's Anti-Panic Sparkling Power Jellybeans".
As backup, I have the "Grenades of Minty Deliciousness".

Thursday, July 3, 2014

OMG Shoes! A Lesson On Viking Footwear

Well...boots, actually.
I just found the perfect boots for my Lagertha battledress reproduction, all thanks to DSW.
Who else would have a giant selection of boots in the dead of summer? They do.

These are sure to be comfy for stomping my way through DragonCon, too. Made by Crown Vintage, this is a brand I'm familiar with, as I sold many styles to customers with sensitive feet. When I worked in shoe sales, this was a favorite of both mine and my customers. It still is, and I got a super deal on these babies.
These are called "Rugged", and I ordered them in Brown to go with the dark brown suede pants worn under the Lagertha ensemble.


One amusing thing I noticed about the boots Lagertha wears, is how modern they are compared to actual Viking footwear.


This extant boot found in York is an amazing example of a basic "bootie" worn by the Vikings, complete with the toggle clasp we still see on traditional Scandinavian (and Scandinavian-inspired) clothing and accessories.
://www.np-historicalshoes.com/vyrobky.php?lang=sk&ktg=2
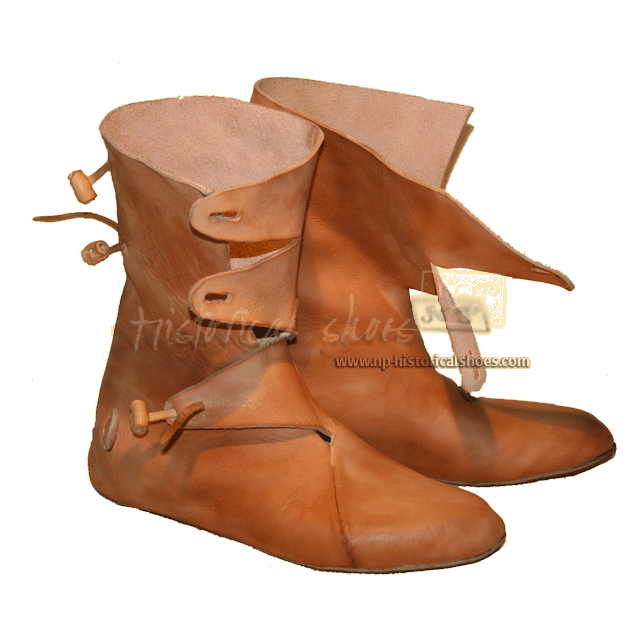
Above is a pair of absolutely stunning modern reproduction Viking tall boots, made after an original pair found at a Viking excavation in Belgium. Made by hand at:
 www.np-historicalshoes.com


Lagertha's season 1 footwear on the left, and season 2 on the right

Season 1 has an interesting wrapped leather strap detail on the lower pant leg, over what looks like the exact same boot as season 2.
So I'm ending up with a combo of the two styles.
I'm sure the modern footwear was done for comfort levels, and the fact that it's television. Yet some of the other characters, like Floki, have some interestingly accurate historical boots.
Going against my historical leanings, I'm going to stay true to the styles seen on the TV character.

In television, there are going to be very few if any large close up shots of anyone's feet. At least not any shots that are showing any level of detail regarding footwear. If it were a film being released on the big screen, there might have been more care taken with utilizing slightly more historical footwear.
Either way, I'm not paying attention to what's on their feet most of the time because the rest of the wardrobe, lacation and overall show is so stunning.


A Shieldmaiden's Search: Chainmaille Found!

For my reproduction of Lagertha's season 2 battledress, I've had a few bumps in the road during my search for the correct chainmaille.
The first one I found was just not up to the quality standards I desired, nor were the rings anywhere near the correct size. They were so off, in fact, that they would have been noticeable and messed with the fit and finish of the added tooled leather details.

But my worries are lessened a great deal since yesterday, when I received another chainmaille hauberk in the post. The ring size and finish is beautiful, and exactly what I need.
A big thanks to Dark Knight Armory for getting this to me so quickly, too.
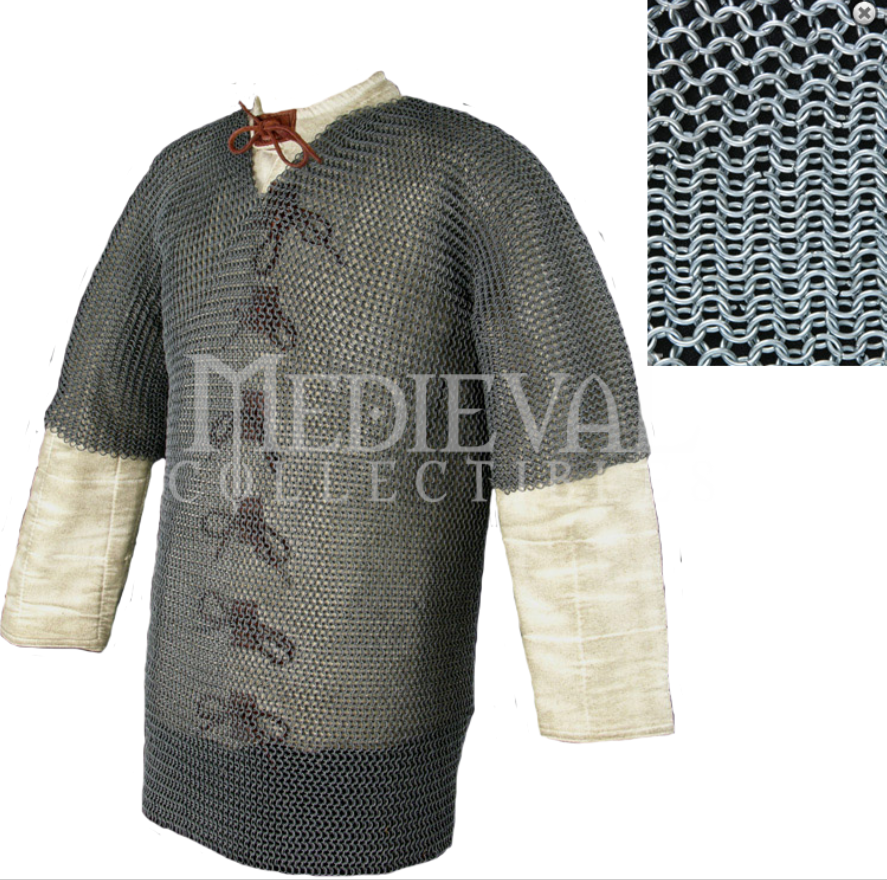
The one I purchased was their Short Sleeve Butted Chainmaille Hauberk.

Dark Knight Armoury

This will get pieced apart (and I'm grateful that a lot of the dead weight will be lessened by this), and used to make the sections of Lagertha's armor in the top photo.
The only current issue I have with the new maille, is that it's drenched in the protective oil used to prevent rust during storage/shipping.
I really don't think I'll be needing or want *that much oil on my maille nor on the rest of my gear right now, so I'll be removing a good portion of it this weekend. It's going to get a quick bath in some very hot water and dish soap, and since it will be a hot sunny day, any rust will be absolutely minimal as it hangs out to dry. I'll be able to gently brush any tiny rust spots away with a Brillo pad, or just by rolling it around in a towel.
I will be reapplying some oil to it after wearing it, and if I plan on storing it for any period of time. Plus, the right oil might be good for keeping the leather bits conditioned, too.