Friday, May 30, 2014

Frozen Fun At Disneyland: For 24 Hours Non-stop!

Well, almost 24 hours. We tried though!
I only have a few photos so far, but more are on the way.
Disneyland not only allowed everyone to dress in costume, but Friday into Saturday was a 24 hour long event they do once a year over Memorial Day weekend. 6am Friday to 6am Saturday. We arrived sometime in the late morning, and hung on as long as possible.
So, photos!
Some of you might have seen these already on Facebook, but for those that haven't; enjoy.
I need to find or get some better shots of this version of my Elsa costume, and I ended up not having enough time or energy left to sew on the final layer of sequins and rhinestones to the bodice. However, there are some fun shots here regardless ;-)
Many thanks to Laura, Aaron and many of the Disney employees for the photos.

With Laura as Anna, taking a break... aka "Iced Tea".
Her Duffy bear is even dressed as Okin (Yoohoo, big summer blowout!)

 About to climb the North mou...er, I mean ride the Matterhorn!

A quick pose while waiting for Snow Whites Scary Adventure ride.

A wall at the Animation Academy; we just HAD to.

...and just HAD to pay Thor a visit in Tomorrowland.
When he saw us, he happily quipped, "Oh! These are friends!"
;-D


Later that evening..er, early morning, Laura went back to the hotel to sleep while Aaron, Brad and I (I shed the Elsa gown and changed into Elsa pants and t-shirt) pushed on until 5am! The above photo was taken around 12 am(?) at Disney's California Adventure, before our second wind hit.

 At Flo's, refueling

They closed DCA, at some point, it's all a blur, so we headed over to Disneyland next door to do the final stretch until 6am, after some tasty breakfast food at Flo's diner.
I must say riding the Matterhorn at 3am, in the dark, is amazingly fun and when the sleep deprivation sets in 'Dizzyland' can get a bit surreal.

 It's 4am Mouseketeers, do you know where your giant bear is?

The Mad Hatter's epic dance party was raging, and you could hear the 'oonz oonz' all night into the wee hours.
We made it to 5 am before our bodies finally said enough.


Later that afternoon, after at least 6 hours of sleep, our feet were somewhat recovered.
So Laura and I donned our 1939 Frozen inspired dresses, and tracked down Mickey (who was wearing some very smart looking pants and suspenders) for some fun photos at DCA.

 "In Summer!!"

Coffee!! Sunday was even more casual, with Laura and I in our Elsa and Anna t-shirts with appropriately inspired accessories.

Our last few minutes before the drive home; Aaron and I don't wanna leave, Brad is exhausted and oblivious, and Laura (lucky duck) got to stay another 2 days!


Thursday, May 22, 2014

Elsa's Snow Queen Costume: Details, Details...

During my lunch breaks over the last two days, and well into the witching hour last night, I drew up the design details and applied all the crystal to the neckline and sleeves of the Elsa shirt (worn under the bodice).

 The shirt laid over the template and wax paper between the shirt fabric.

This is what I like about working with sheers when having to do applique or surface design;
you can see through it. I know the neckline here looks small compared to Elsa's almost/off-the-shoulder style, ut this is just what mine looks like when it's not on. The edge actually stretches open more and sits nicely on the outer curve of my shoulders. After a few wearings, once the rhinestone glue along the neckline expands a bit, it will fall a little lower on the shoulders like hers.


This picture is not such a good example, and not what I used to get the complete design, but it helped.

After finding a clear enough image of Elsa's arms and sleeve design, I was able to freehand sketch a template on paper to use as a guide. I rolled the final draft of that up with a top layer of wax paper into a tube, shoved it up each sleeve, pinned it in place and began applying the remainder of my crystals. Nearly 900+ Swarovski crystal flatbacks in various sizes have gone into this shirt.

 Early stages of the design.

First sleeve prepped and ready for the sparkle to begin.
This was taken before finishing the sleeves into points at the wrists. I also added clear elastic finger loops so they stay pointed and don't flip back over my hands.

I actually used two different colors of crystal; one was the regular clear crystal with the foil backing, the other was a color called 'crystal shade' and it has a very subtle silver coating on the face of the stone. They are extra sparkly and have a slightly different hue.

I have photos of a finished sleeve, but it's on my camera at home. I'll be posting photos of me wearing the whole thing soon enough, so stay tuned! I might also keep this as the shirt I use for the DragonCon version of this costume, but this is a first draft of sorts. There are a few design details I'd do differently, but if I end up not getting to it by the end of August, I'll at least have this one ready to use.

Now, off to Disneyland!

xoxox


Tuesday, May 20, 2014

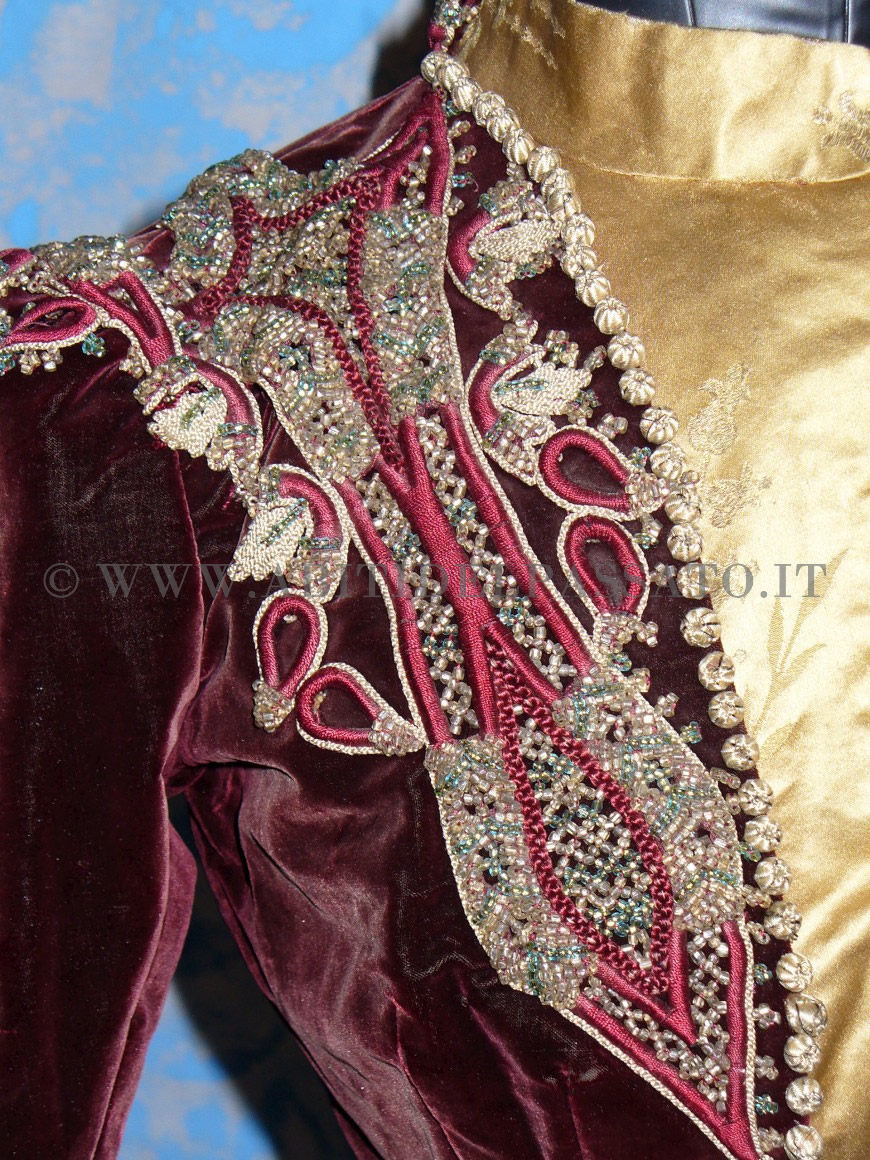
A Fabulous Antique Clothing Reference

Scrolling through Pinterest during lunch today, I stumbled across a great website chronicling a vast collection of historical clothing between the 18th to 20th centuries. Some of you may have already known about this little corner of the web, but it's new to me.
It's all in Italian but navigation is pretty straightforward, especially after you learn a few of the words via Google Translate ;-)
The photos are not the greatest quality and some of the dates on a few items seem off a bit, but it's still a great resource for ideas and inspiration.

Abiti del Passato:  http://www.abitidelpassato.it/contents.aspx

One of the beauties found on the site:


Monday, May 19, 2014

Elsa's Snow Queen Bodice: The Finishing

** Sorry for the typo in the title earlier. I was writing this post late at night, on very little sleep ;-)

 Finally, I was able to assemble the bodice portion of this costume. I still need to do some decorative work, and in all; this is definitely not my final version of this costume. But even with all its flaws, it will be a fun and (hopefully) more comfortable version for running around Disneyland next weekend.
I wish the below image could show how sparkly the layers really are.
Like I mentioned, this will get another light layer of the rectangular blue sequins and rhinestones for added depth. I'll probably be sewing those on in the car on the way down to Anaheim.


I had to add a cotton lining, otherwise the itchiness of the underside, with all the exposed edges of sequin and glitter fabrics, would be unbearable. It makes it all a bit bulkier than I'd have liked, but it's worth it for the comfort. I simply whip-stitched the lining in along the top and bottom edges, and I'll be adding a back panel to fill in space under the laces.


I also added lacing grommets up the back. I only had the larger size on hand, but these will do fine for this version. Normally I don't use a hammer, but tapping the rings together gently worked out ok and didn't split the washers.


I also found an entire bolt of the fabric I'm using for my dragon con version of the cape.
I wanted more yardage just in case. Unfortunately it sold out of most Joann Fabric store locations, and even sold out of that particular color on the website. Luckily, as if it were waiting for me, I found an uncut bolt sitting on the shelf just the other day when I was just looking for more thread
So, I was able to take some of the yardage from my first stash of this glimmer tulle to make a shorter 'walking length' version. Photos of that soon.


Thursday, May 15, 2014

Frozen: Deco Style

Since I can't pile enough projects on my plate lately, I decided that I needed to make a late 1930s Frozen inspired dress. I think much of the inspiration came to me the moment I stumbled across a printed cotton that had Elsa's ice bodice design.
I had a hard time choosing a dress design from my vast collection of vintage patterns, but I finally settled on a 1939 Advance pattern (style #4). Just enough ruching on the bodice, but not too much, and I might do a slightly less puffy sleeve.
My plan is to do a two-tone design, pairing the pale Elsa print on the bodice, with a deeper turquoise cotton for the skirt, short sleeves and piping on the shoulders
I'm hoping to get it done for the trip to Disneyland this Memorial Day weekend!


Elsa's Snow Queen Shirt

During my lunch hour (after I had a tasty curry), I spent some time applying the small Swarovski crystals to the neckline of the Elsa shirt. I hope I can get to the sleeve detail in crystal this weekend, too.


Friday, May 9, 2014

A Polonaise Continued: Red Silk For A Petticoat

It has arrived!
The Ruby Red silk I ordered from Renaissance Fabrics, landed on my doorstep after I returned home from work today.
As expected, the quality is divine and the color is sumptuous, but soft when compared to most red fabrics of today. Perfect for the 18th century. It leans toward a warm rose color, with a very slight golden undertone.
And of course, it's a perfect match to the polonaise gown fabric.
I'll probably pair this gown with contrasting colors of petticoats in the future, too, as I have a similar one I need to make in a gold silk taffeta (for another project). I can mix-and-match!
I think I just wanted this red color because of the challenge; to find a soft red and hope that it also comes in a lovely silk taffeta for historical sewing. I can happily say this search has proved successful.


Tuesday, May 6, 2014

A Polonaise Continued

As another little escape from the cosplay side of things here, I finally caved and purchased 3 yards of luscious ruby red silk taffeta. This will become the petticoat for the 1770s polonaise I've had on the sidelines (for AFTER I get the stays built), mentioned here and here. I finally found the right red to accompany the color of the print on the cotton I will use for the polonaise. I found plenty of 'OMG that's red' reds, muddy burgundy and way-too-dark/pink wine shades to be of any use. Renaissance Fabrics had this lovely Ruby Red that, I think, will work perfectly or at least darn close:


The back of my dress in the red & ivory stripe cotton.

I won't be making the entirety of the petticoat out of this silk, choosing instead to make the parts covered by the polonaise out of a fine burgundy or neutral cotton. This is an historically accurate way to save on silk, and was done by even the upper classes. 3 yards should be plenty to cover the front and lower hem around the back in silk over the red cotton lining, leaving the remaining silk to make a flounce or a lot of ruched trim.

I'm going for something between the very late 1770s, to around 1780. Something like this:


As you can see above, the trim on the contrasting petticoat only decorates the front, something I find interesting and as a bit of a relief. I don't *need* to try and trim the entire circumference, and it's still historically appropriate. I also know I won't have enough of the printed polonaise fabric left over to make trim from. So, the use of a sheer ivory silk organdy I have stashed away should make for a nice contrast trim, similar to the gown in this plate:


Of course, the trimmings on the polonaise will be different, but I wouldn't mind experimenting with that ivory silk organza I have. Some of the textures on the body and sleeves are stunning, and I'd like to try doing some Hertzenruch (heart ruching) style trims in that sheer ivory. Below uses a similar technique as what we see on the gown above, only done on a single ribbon:

You can find a tutorial on how to do this style of trim here at Threads.